
First, let me say how knocked-out and delighted I am to have my photograph of the sporangia (a posh word for fruiting bodies) of a slime mould take first place in the Up Close and Personal category of Ealing Wildlife Group’s photography 2022 competition. I’ve had a few emails/messages asking me how I achieved the photograph and I was asked about the process in person at the exhibition opening in Walpole Park, too.
Slime moulds are fascinating organisms. Their life-cycle includes a free-living single-celled stage, almost like an amoeba or a bacterium. When food is in short supply these single-celled organisms will congregate and start moving and behaving as a single body. They can detect food sources and can ‘shape shift’ and readily change the shape and function of the parts of their aggregation and can form stalks that support fruiting bodies – sporangia – that produce spores. The sporangia are usually very small, and can take some finding. I have a ‘slime mould farm’ in the garden that consists of a small pile of twigs and logs that I keep damp and in the shade, but even then ‘photogenic’ fruiting bodes seldom occur. I think this is because the single-celled organisms have plenty of food – microorganisms that live in dead and decaying plant matter so have not been triggered into aggregating. Slime moulds are not considered fungi by the way, but are classified within the group Protista.
Here comes the geeky stuff:
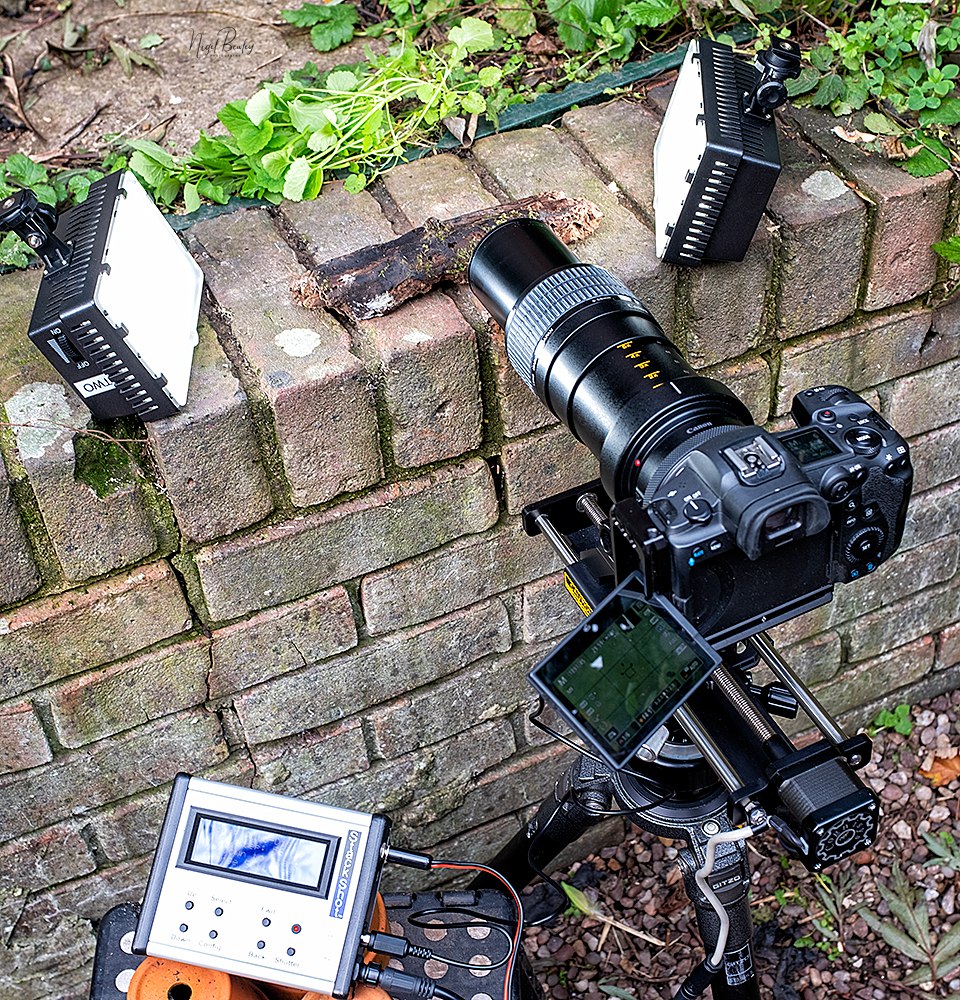
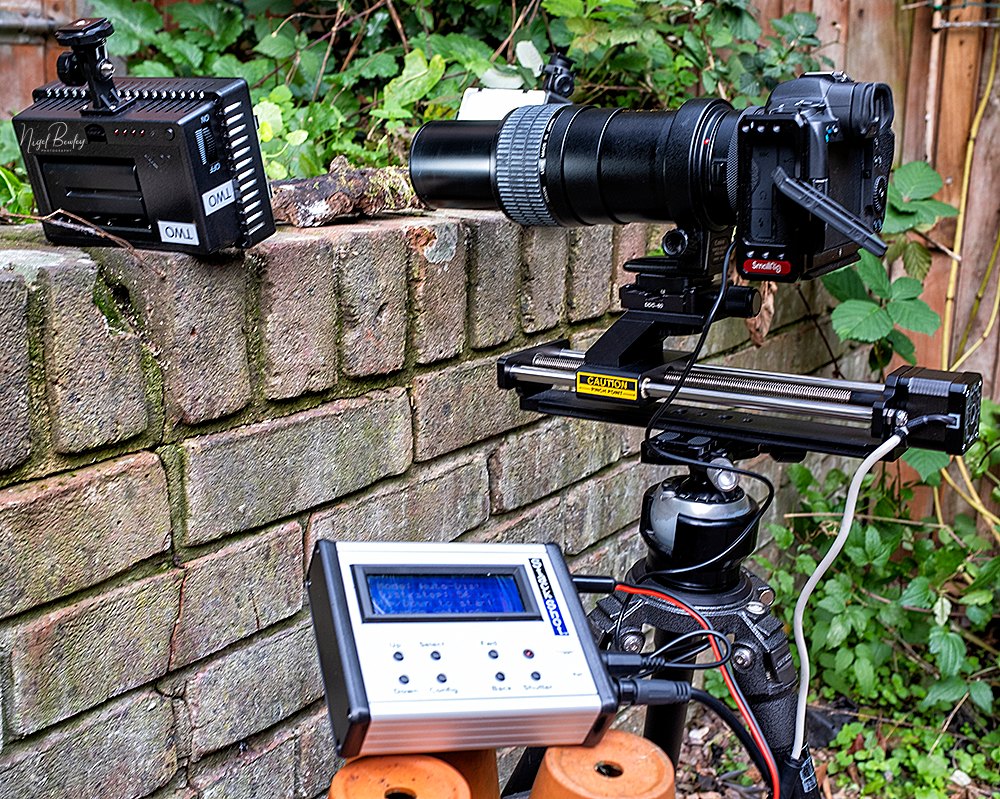
The sporangia in my photograph are very small and are around 1mm high, growing on a piece of decaying wood in my ‘slime mould farm’. After I found the slime mould I set up the equipment to photograph it. In order to achieve the magnification presented in the exhibition’s printed image (around 400 times life size) some specialist macro kit was required. I used a full-frame Canon R5 camera (that produces a high resolution file that can be readily enlarged) and a Canon MP-E 65mm macro lens. Most macro lenses can achieve a magnification of x1 but the specialist lens I used can provide magnification of up to x5. It’s an entirely manual lens and can be very tricky to use. At x5 magnification with such a small subject the depth of focus is wafer thin, especially as I wanted to use a near wide open aperture of f/4. It’s true that I could have stopped down the lens to f/16 to increase the depth of focus to a useful amount but this would have required a long exposure time of several seconds and, more importantly, would have softened the image because of diffraction. Instead, I used a technique known as focus stacking.
In focus stacking the image is not reliant on a band of acceptable sharpness either side of the actual point of focus in a single photograph. Instead there are many individual points of focus through the depth of the subject resulting in critical sharpness throughout. A series of identical images are taken, each with a slightly different point of focus throughout the depth of the subject. The resulting images each include a ‘slice’ of sharp detail and a fair amount of unsharp, out of focus information. Software is then used to ‘stack’ all these slices of sharp detail into a single image of exceptional clarity and detail. I use Helicon Focus to achieve this. The software essentially looks for, and keeps, the sharp detail and throws away the unsharp, out of focus bits. The sharp detail is combined to form a single coherent image.
How are several identical images (apart from different points of focus) taken? The camera and lens was mounted on a Cognisys Stackshot automated macro rail and this was mounted on a rock-steady tripod. The macro rail is controlled by a small, basic micro computer that moves the camera and lens forward by a small amount during the photograph-taking process. This amount, the focus step distance, is critical to the process to guarantee a series of overlapping bands of sharpness throughout the depth of the subject. This step distance is calculated from a combination of sensor size, aperture and magnification. Look-up tables are available to avoid the maths!
Once the subject has been composed, framed (it was lit with two small LED panels) and exposure determined, the macro rail was set to the start point, via the controller. This is the focus point just before the nearest part of the subject. The end point is then set, also via the controller, to focus just beyond the furthest part of the subject. The focus step distance from the look-up table is entered into the controller and the ‘go’ button is pressed. The process starts with the controller sending the macro rail to the predetermined start point, firing the shutter and moving the camera the required focus step distance through to the end point. In this case the focus steps were 56 microns and there were around 60 separate photographs. This means a total travel of the camera and lens of around 3 millimetres.
I realise it all sounds very complicated and specialised. It took me a while to get to grips with the process but I think the results can be worthwhile. I like the slow, painstaking process that reveals subjects that are barely visible to the naked eye.
If you have read this far you are probably interested in this geeky stuff and in macro photography. If you would like a macro photography workshop/tutorial drop me a message. It will be 1:1 or 1:2 and not one of my usual much larger group sessions.