Top Tips for a Winning Entry in the Photo Expo
So you want to enter a photo into the upcoming photo exhibition but you worry about the quality of your photos? Fear not I am here to help! First I’d…
0 Comments
29 June 2023
So you want to enter a photo into the upcoming photo exhibition but you worry about the quality of your photos? Fear not I am here to help! First I’d…

First, let me say how knocked-out and delighted I am to have my photograph of the sporangia (a posh word for fruiting bodies) of a slime mould take first place…
By Kish Woolmore How to make a cheap low-cost Moth Trap: Generally retail price for readymade moth traps relatively expensive, starting around £150 with good ones being several hundred pounds.…

Nigel using his telephoto lens in the New Forest Telephoto lenses have long reaches and are great to 'bring the subject closer' to achieve detailed, frame-filling photographs. They can be…

At the mention of Zen, a Buddhist monk in search of enlightenment might come to mind. When I think of Zen, I think of an approach to photography, especially my…

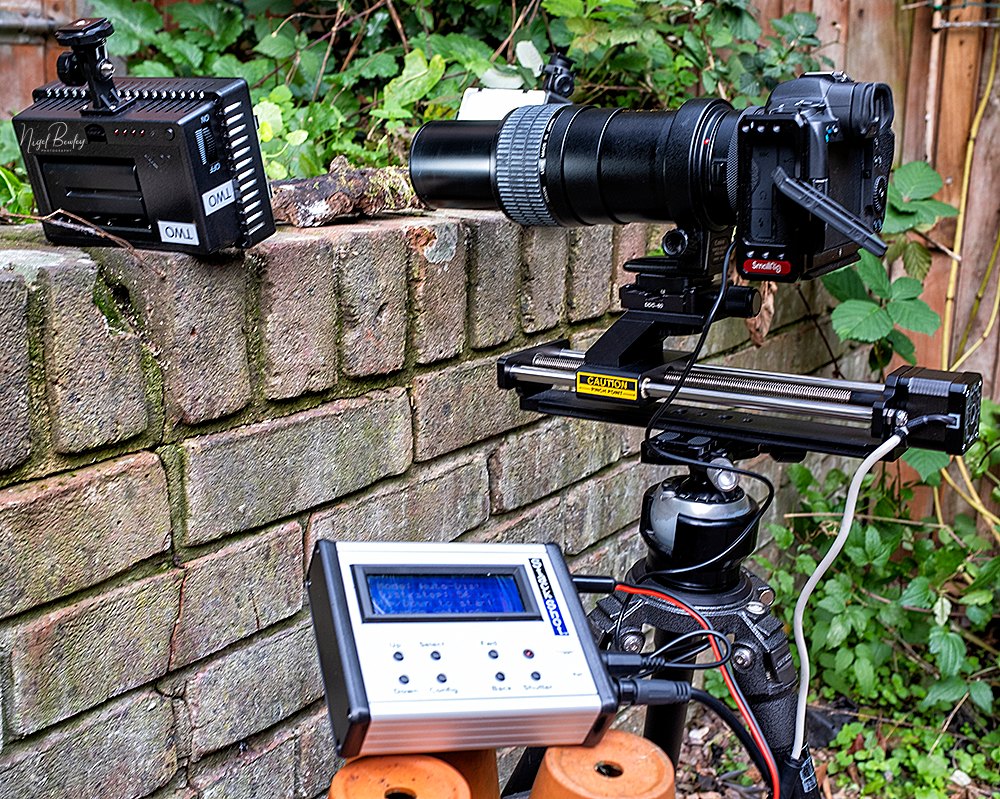
Long time EWG member and nature photographer extraordinaire Nigel Bewley has put together two new photography tutorials for us! This one is about macro photography, perfect for up close shots…

Long time EWG member and nature photographer extraordinaire Nigel Bewley has put together two new photography tutorials for us! This one is about photographing birds in your garden and the…

Long time EWG member and nature photographer extraordinaire Nigel Bewley has put together two photography tutorials for us! This one is about Wildlife in its Environment and the previous one…
Long time Ealing Wildlife Group member and nature photographer extraordinaire Nigel Bewley has put together two photography tutorials for us! This one is about Birds in Flight and the next…